
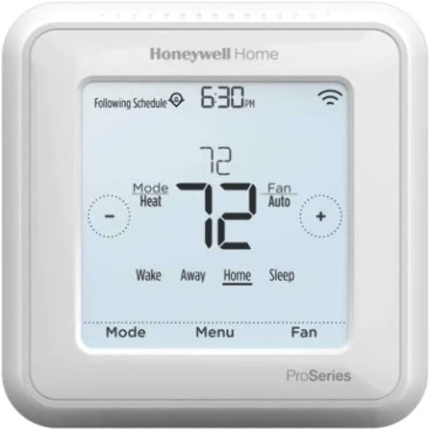
Your Honeywell T6 Pro
The following guide includes all the information and guides related to setting up and using your Honeywell T6 Pro thermostat.
Brand: Honeywell
Model #: TH6220WF2006 or TH6320WF2003
Vendor Application: Resideo Mobile App
Setting Up Your Thermostat
If you're getting your new thermostat set up for the first time, follow these video instructions as your guide!
Connecting a Wifi Network
Enable Wifi (Initial Setup)
To enable WiFi on your Honeywell T6 Pro, follow the instructions below:
Touch the screen to continue
Select YES to continue setup using the app
Use the < and > buttons to navigate the menu
Touch EDIT to modify each setting
Touch SELECT to save the settings
You will be prompted to connect to your WiFi network
Resolving WiFi Connectivity Issues
You can check for a WiFi icon in the top right corner of the thermostat display.
To reconnect your WiFi, follow these instructions:
First, ensure that WiFi is enabled on your thermostat. Follow the instructions above ("Enable WiFi") to confirm.
Next, power cycle the thermostat. Remove the faceplate from the wall and place it back.
Then, reset your WiFi connection:
Log in with your credentials
Using the menu at the top, select the store location from the drop-down
Navigate to the thermostat—it will likely be listed as Offline
Click on the thermostat
Click on Settings
Click on "Reset WiFi"
The app will guide you through the process to re-establish your connection
If successful, the thermostat will no longer be listed as Offline in the app
If issues persist, contact our team for assistance:
Email: implementation@davidenergy.com
Phone: (347) 771-8233
Programming Schedules
Program Schedules on Thermostat
Press the Menu button
Press the right arrow to display Schedule
Press Select
Press the Sched. On/Off option in the lower-right corner to enable the schedule option
Select whether you want to set a schedule for weekdays or the weekend
Select the part of the day you want to program
Use the plus or minus keys to adjust the time
Set the heating and cooling temperatures for that time
Press Set Schedule to automatically set the program
Program Schedules via Resideo Mobile App
Enabling "Auto Mode"
If you choose to enable "Auto Mode", follow the steps below.
On the main menu, long press on the “menu” button till you see “Device setup” on the screen.
Press on the “Select”
Use the right arrow keys till you see “ Off - Autochange over”
Press “Edit”
Use the right and left arrow keys to change to “On”
Press “Done”
On the “Auto differential” screen, press edit and set it to 2
Press “Done” and press Back till you reach the main menu.On the main menu, select “Auto” mode.
It should now show “Auto” on the main screen before it switches to “Cool” or “Heat” mode.
Locks & Restrictions
Below are two options for setting restrictions of locks on this device.
Temperature Range Limits
Set the minimum and maximum cool/heat temperature set points. This allows for onsite changes within a defined temperature range.
This is ideal for locations that want "flexible" restrictions and does not prevent your staff from making necessary onsite changes, if needed.
To set this up, follow these instructions.
Device Lock with Pin Code
Configure a pin that is required to make any changes to the thermostat locally.
This option is ideal for locations that want to prevent any changes on the thermostat, as much as possible. But be sure to write your pin down!
To set this up, follow these instructions.
Lost your pin? The video above highlights how to factory reset the device.
Help! I'm locked out of my thermostat
If this happens to you, follow these steps:
Remove the faceplate
Find the date code on the back plate; it's a 4-digit number
Add "1234" to this number
For example: If the date code is "1111", your new code would be "2345"
Enter your new code into the thermostat
You should be able to access the home screen